Configuring your output string in your motion software (Mover, SimHub, SimTools, etc.) could be confusing.
You need to do the mapping between the ODrive axis and the motion software axis.
In this article we will guide you step by step and with a real example.
Prerequisites
Before configuring output string, please be sure that your position bit output is set to 16bits. This is often the default value on motion softwares.
This means that WyboController will have a precision of 65536 points on the length of the axis.
Exemple: For a 450mm axis, the precision will be 0.007mm !
On FlyPT Mover: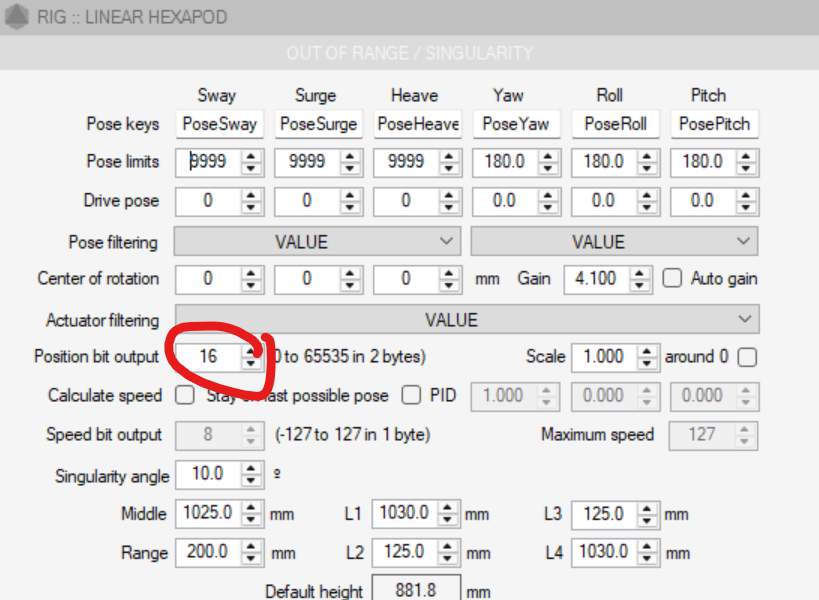
On SimHub: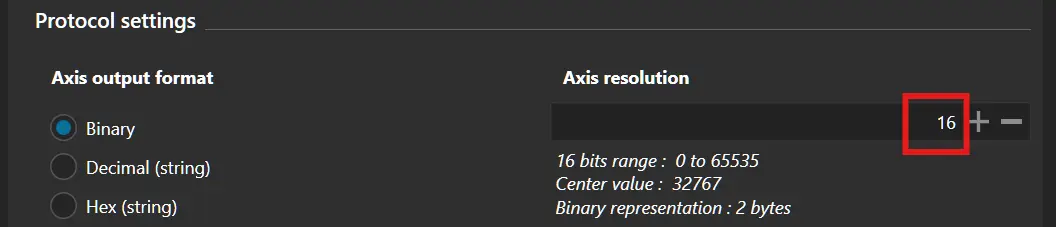
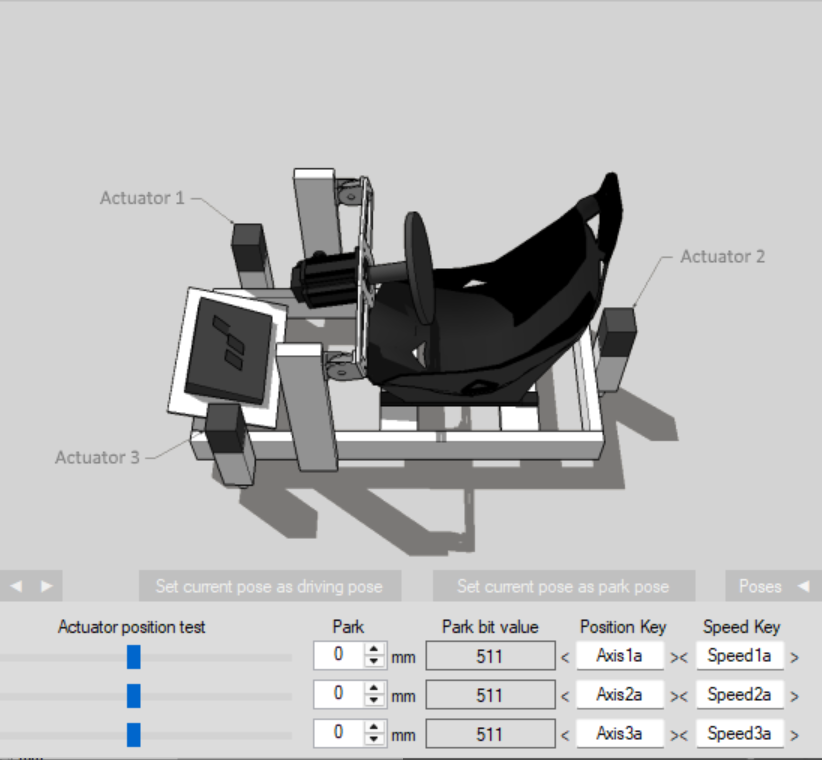
Let's take a real exemple with a 3 axis simulator:
Mover configuration
Here is the simulator configuration in Mover2:
- Actuator 1 = Axis1a (front right)
- Actuator 2 = Axis2a (rear)
- Actuator 3 = Axis3a (front left)
WyboController configuration
The configuration in WyboController should be like this:
2 ODrives connected with 3 active axis:
- Front Right with code FR,
- Front Left with code FL,
- Rear with code RR
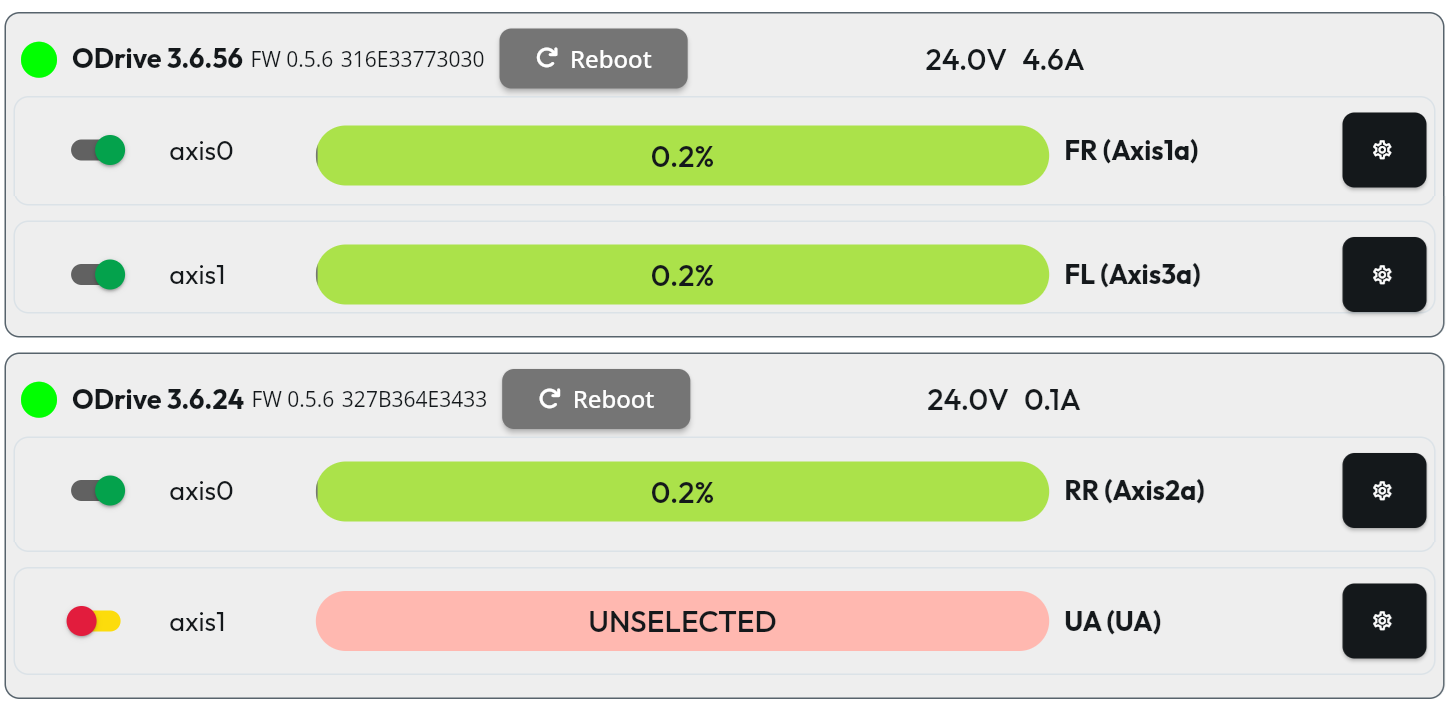
Note that you can rename the code and description of each axis as you need.

Output String
Since version 0.20, the WyboController use an output of type Bytes/Binary and not Decimal/Text anymore).
This type of output is lightweight for the computer, the network, and the controller, making all the system globally more efficient.
The format is like the following:
AA<Axis1>BB<Axis2>XX<AxisX>...
where:
- XX is the WyboController key of the axis, on 2 characters
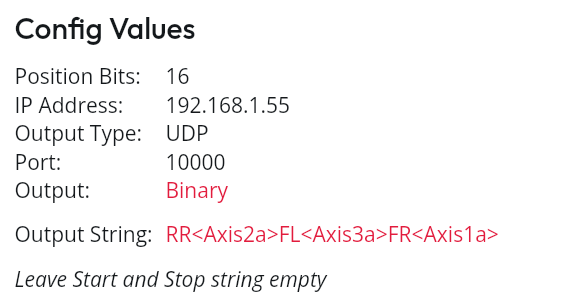
- <axisX> is the axis code on your motion software, for exemple:
- <Axis1a> with Mover2 and simtools
- <R0.A1.B> with Mover3
- <Axis1> in SimHub
If you wrote the Mover's axis name on the description field, you can simply copy-paste the output string WyboController has generated.
WyboController does not need start and stop string for now, but you can input ZZ00 in the stop string for auto parking when you disconnect the motion software. Note this will release motors and stop WyboController.
Exemple in Mover2:
For Mover3 it should be something like this: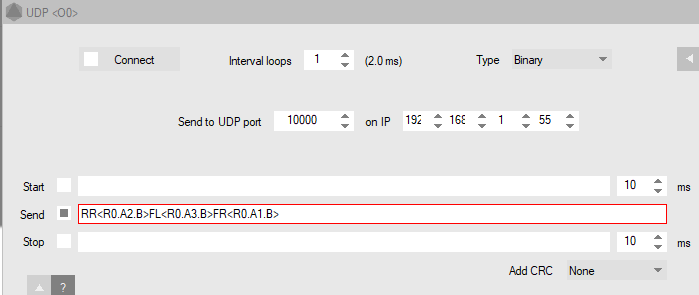
For SimHub: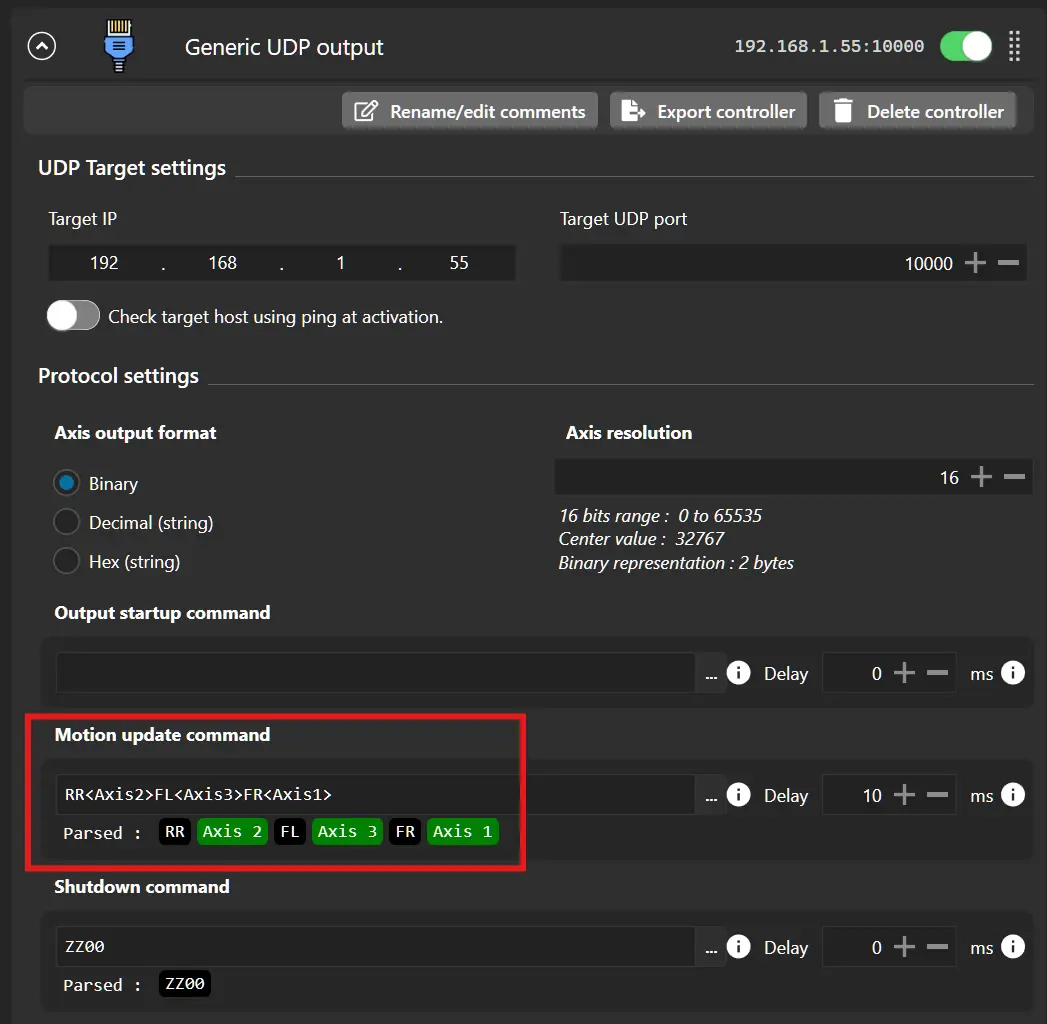
Note: the order of the axis pairs is not important